Initial setup
Thank you for choosing RZBneo®.
To successfully start using the software, we recommend following the steps listed below. Afterwards, you can begin regular work in RZBneo®.
- Setting the user preferences of the main user
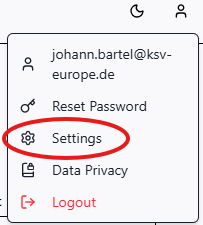
You can access the user settings via the user button in the top right. Here you set the desired date format and the lead time for deadline monitoring. - Creating additional users (Administration -> User)
Create all users who will work with RZBneo® in the menu item Administration -> Users. - Assigning the necessary access rights (Administration -> User -> Add Entry -> Permissions)
Assign the desired access rights to the newly created users, if they have not already received administrator rights. - Populating the basic tables
Add the necessary entries for you to the basic tables listed below in the menu item Administration and define default values in these tables: - Languages
- Series
- Vehicle Clusters
- Infrastructures
- Checking the pre-installed forms (Administration -> Forms)
KSV provides various forms. Carefully check these forms for the entered data and formatting before first use. - Creating train drivers
Now you can start creating the first train drivers by entering basic data and qualifications. - Storing documents
RZBneo® offers you the possibility to store documents (e.g., certificates / certificates for qualifications) for all train drivers in the system. If desired, add the relevant documents. - Creating a draft of an certificate
Now start creating a draft of an additional certificate and check the data and its representation on the form using the buttons.
- Issuing the certificate
Issue the first additional certificate by clicking. The corresponding employee will then be displayed in the dashboard, and deadline monitoring will start automatically.