
Creating train drivers
You manage train driver data via the menu item Train driver. To create a new employee, open this menu item and click Add entry below the table.
The empty input form for the train driver base data then opens. Here you enter all mandatory information as well as, if desired, further data on the train driver. In this view you can also create the skills of the train driver.
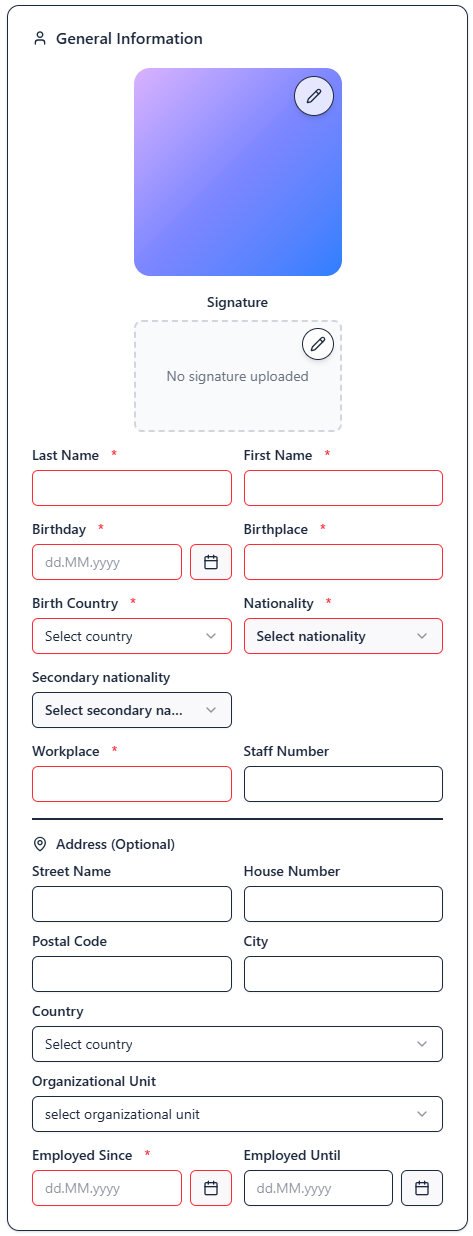
General information
In the General information section, the following fields are mandatory fields, which you must fill in in any case in order to be able to save your entries afterwards:
- Last name
- First name
- Date of birth
- Place of birth
- Country of birth
- Nationality
- Place of work
- Start of employment (required for creating the EBA form for reporting the start of employment)
Fields that are not required are marked with the note "(optional)". Uploading a photo is also not mandatory.
Assigning an employee to an organisational unit
If multiple organisational units exist in your instance, you can assign the employee you are creating to one of these organisational units. To do this, select the desired entry from the dropdown list in the Organisational unit field.
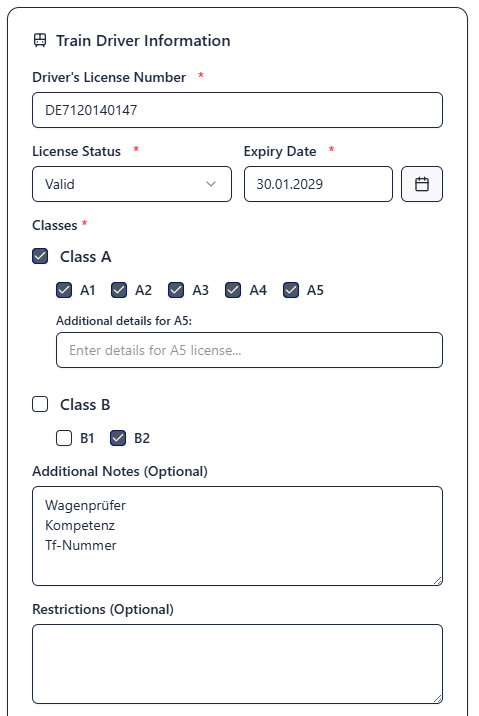
Information on the train driver's licence
In the middle section of the input window, you enter all information on the employee's train driver's licence. The mandatory fields here are the twelve-digit train driver's licence number, the status of the train driver's licence, and an indication of the classes covered by the licence.
In addition, you have the option of monitoring the expiry date of the train driver's licence. To do this, enter the expiry date in the corresponding field. Deadline monitoring is set up automatically.
Additional information and restrictions
In the input field for additional information, you can enter additional information about the train driver, which is to be printed in the corresponding field on the supplementary certificate. A line break is also taken into account in the output format. Three lines are available on the template for the certificate according to TfV.
According to TfV, the input field for restrictions allows you to enter restrictions on the performance capability and abilities of the train driver in relation to the content of the supplementary certificate.
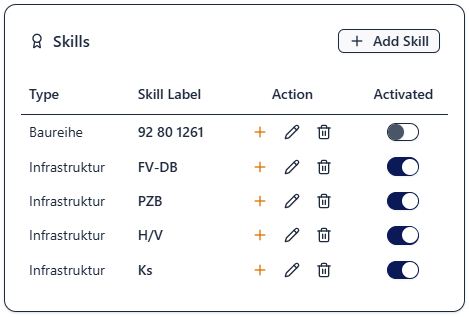
Skills
On the right-hand side of the master data sheet, you will find the input area for the train driver's skills. Here you enter all language, series, and infrastructure skills relevant to the supplementary certificate.
If you have already defined standard values via the master tables, these will be displayed here when creating a new train driver. In this case, you must enter Acquired At and the date of the last review for these skills. To do this, simply click on the pencil icon
Further skills can be created by clicking on Add skill. Enter the acquisition date and the date of the last audit. The date of the expected next audit is automatically added, at an interval of three years. You can overwrite this if necessary. Then select the corresponding skill designation from one of the three lists. By clicking on Create, the skill is saved for the train driver.
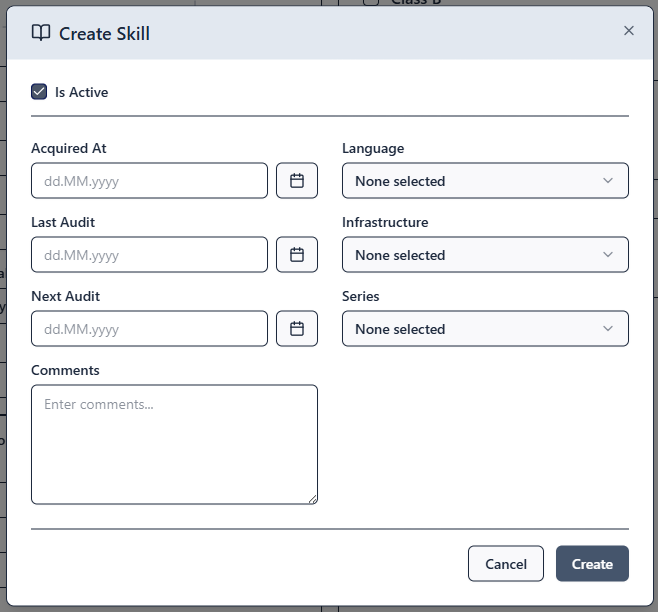
Activating / deactivating skills
To create a skill as deactivated, remove the checkmark in the Is Active field before saving the skill, or deactivate the skill after adding it in the list view using the slider 
Further information (optional)
In the further information section, you can store date values for the last and next medical fitness examination as well as for the last and next audit/ training of the employee's general technical knowledge. If you make entries in these fields, the expiry of the deadline for the next medical fitness examination or the next review of general technical knowledge is monitored in the background. If the deadline is about to expire, this is displayed in the dashboard and the deadline overview.

The Custom deadlines item allows you to define company-specific deadline monitoring. Before entries are displayed in this area, you must first define the terms to be displayed in the custom deadline master table in the Administration section.
Once you have created further monitoring items in the master table, you can now enter individual deadlines in the select deadline field. As soon as you enter the date values in both fields, deadline monitoring takes place. Expired deadlines or deadlines that are about to expire are then displayed in the usual way in the dashboard and in the deadline overview.
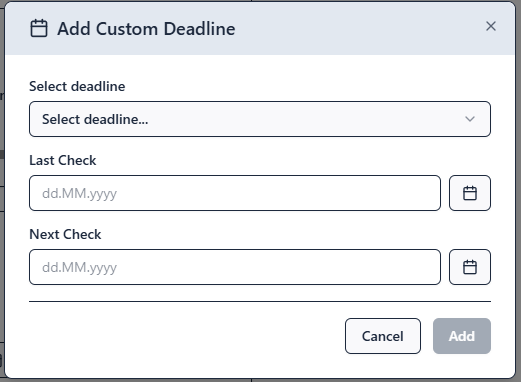
In the dashboard, you will find the custom deadline items for a train driver under the following icon:

Saving the train driver
After you have filled in all mandatory fields, you can confirm the entered data with Create. The train driver is now created in the system and supplementary certificates can now be issued or other forms generated.